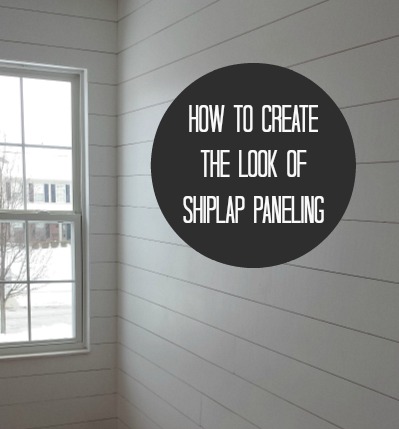
I’ve always loved the look of shiplap-paneled walls, so when we decided to give our son Jake’s room a makeover, I thought it would be the perfect opportunity to try it.
Shiplap can get pricey, though, and our budget was pretty tight, so we decided to fake it instead.
Read on to see how we did it on the cheap!
![]()
How to Fake the Look of Shiplap on Your Walls
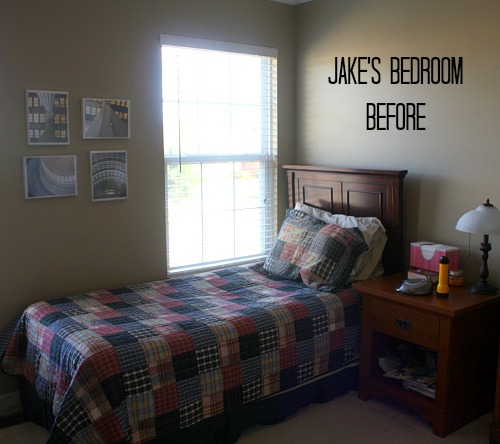
We hadn’t done much with Jake’s room since we moved in a decade ago. It was dark and dated.
He’d been asking for a bigger bed for a while, so for his 20th birthday we decided to surprise him with one. Not only will he be more comfortable when he’s home from college on breaks, but it can double as a guest room.
Here’s how we did it, step by step.
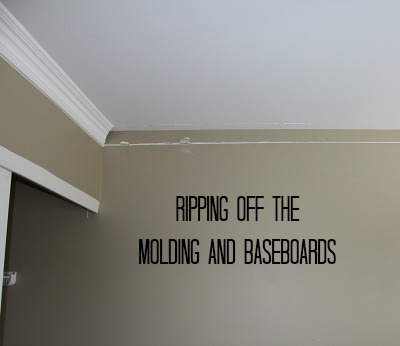
#1. Remove the Crown Molding and Baseboards:
#2. Paint Walls White:
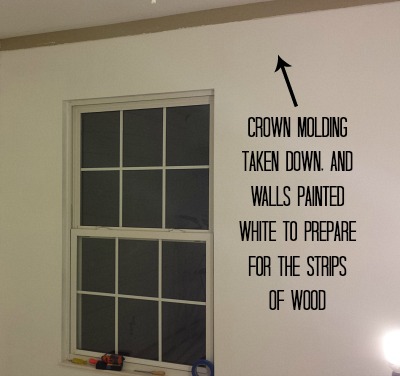
We painted the walls white to cover up all the dark khaki since bits of it would show through the individual slats of wood.
#3. Buy Wood and Cut Into Strips:
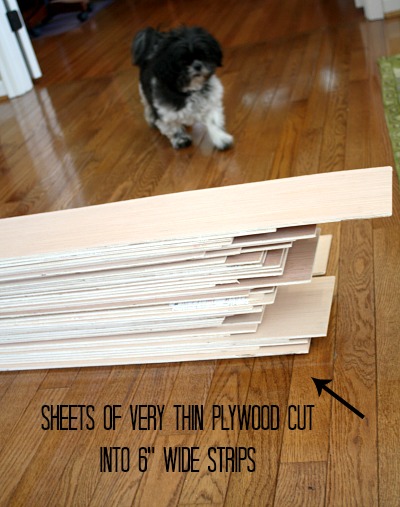
To save money, we bought sheets of very thin plywood at Lowe’s for $13.97 a panel and had them cut it into 6″-wide strips for us at the store.
The “real” shiplap boards cost $8.22/each, so it would have cost us over $400 to panel the room. With the plywood, we spent only $139.
If we were doing a “major room” where we wanted the paneling to look more finished and “hefty,” we would’ve considered spending the extra, but the cheaper stuff was fine for a small bedroom like this.
NOTE: Some tutorials recommend gluing the strips down to avoid warping later on. We opted not to do this because we didn’t want it to be that permanent, and since it’s a small room, we won’t mind if we have to fix a few boards down the road. I wouldn’t recommend this for a bathroom where the humidity would make it more likely to warp, however.
*2016 Update: It’s a year later and we did have to nail a couple of the boards back down that began to pull away from the wall, but the rest are still looking good.
#4. Mark Studs in Wall and Start Hanging the Wood Strips:
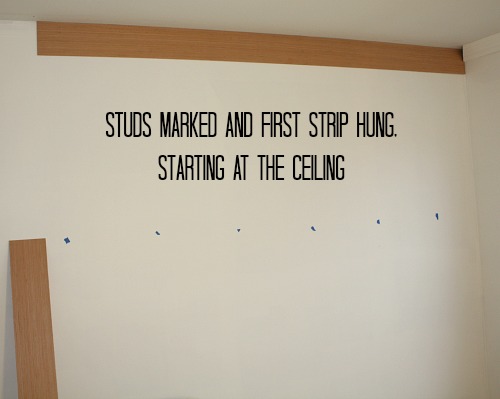
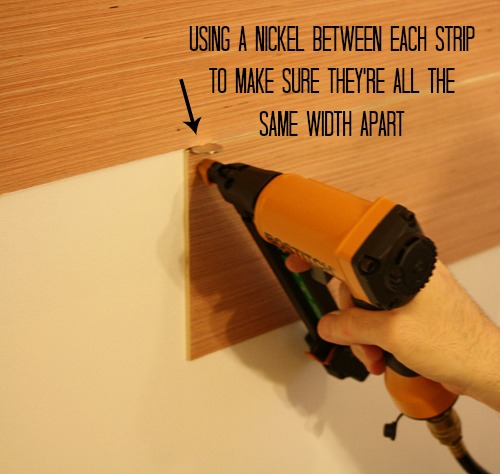
We lightly sanded any rough spots on the edges with a sanding block before hanging them.
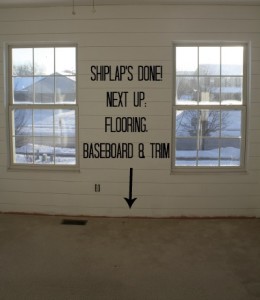
Here’s how it looked when the first wall was finished:
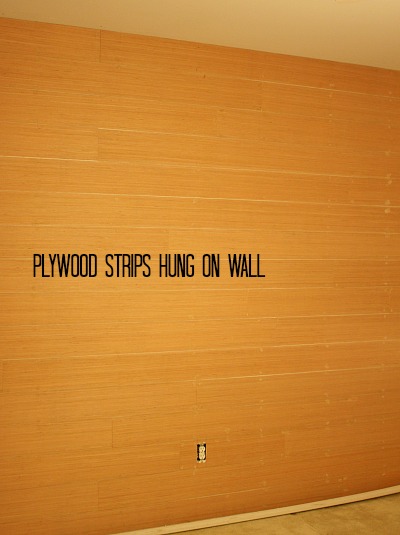
When we saw the result, we wondered why we worked so hard to get the walls white before hanging the wood. You can’t see a whole lot of it between the strips, can you? So maybe don’t worry about painting it perfectly first! 😉
It took 3 coats of Valspar’s Ultra White eggshell paint with primer to cover the paneling because the wood soaked it right up.
#5. Paint the Paneling:
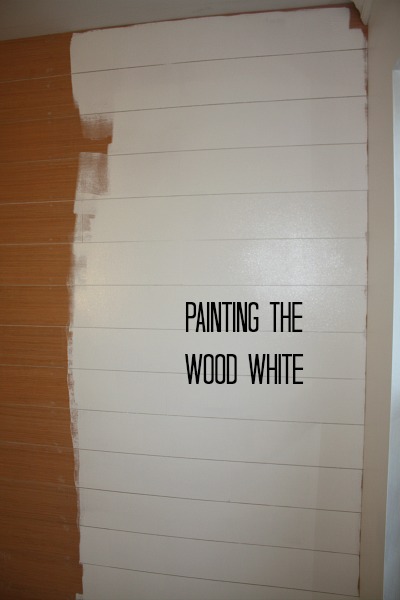
#6. Stand Back and Admire Your Fake-Shiplapped Walls:
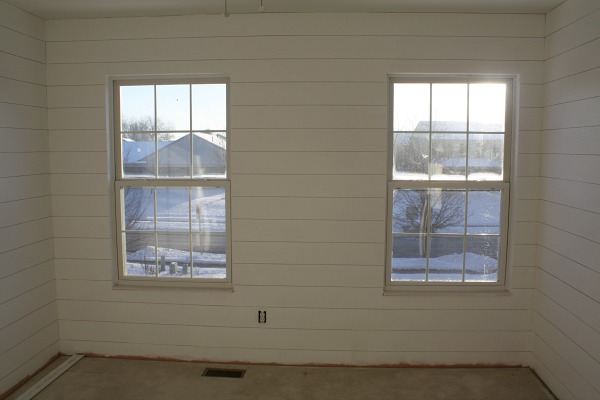
Even though the baseboard still needs to be replaced, the ceiling patched and repainted, and the windows trimmed out, it’s looking a lot better! It has a cottage or cabin vibe now, which is what we were going for.
Stay tuned to see how it turns out!
*UPDATE*
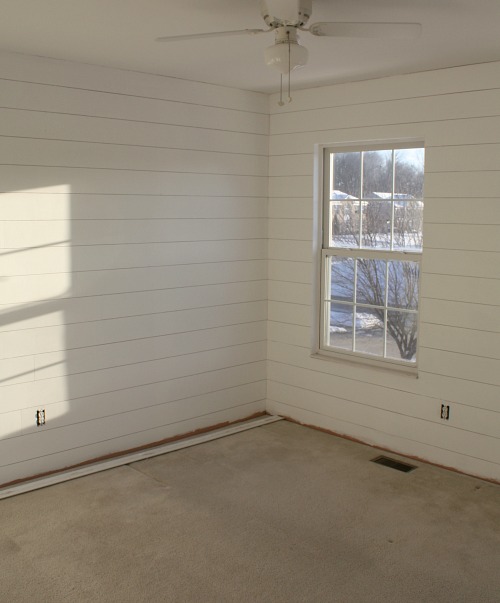
It’s finished! See how the room turned out.



Julia, I love shiplap and love the new look of the room.
I love the look. Using plywood cut into strips was inspired. I can’t wait to see the finished room.
Great Post! Love the look of shiplap. Love the idea of DIY and saving $$$.
Julia- I love the look and the tutorial! This is very inspiring, as I think shiplap gives the walls texture and interest. What a clever way to achieve that feeling and – with a sensible cost! I predict that your son will want to study in here. Or chill out for hours. I cannot wait to see the rest of the room. Well done!
Thank you for sharing!!!
Hi Julia,
I love this look ever since I started seeing it on Fixer Upper – only HGTV show that sometimes likes the same things I do:)
I use Valspar paint frequently and like it. However, my contractor and painting friends all recommend Zinsser 123 or Zinsser BIN as the primers to use over bare wood. I use the Zinsser 123 frequently. It has a faster drying time than the Valspar and great bonding. I used it when painting over my dark stained 1970 pine trim and it covered and bonded great – did need two coats to cover the dark, and then a topcoat – Valspar or brand of choice. I don’t work for Zinsser – just do a lot of DIY and like to pass on a good product.
I’ve never tried Zinsser, so that’s good to know. Thanks, Jeanne! We’ve always had luck with Valspar paint before, but the plywood was like a sponge sucking that stuff up. I thought we’d never be done painting, especially since we had to paint 2-3 coats over the khaki paint before we even hung the boards. I may have whined about it just a little… 😉
I too recommend Zinsser Bullseye 1-2-3 in latex. It’s the only primer I use. I don’t work for them either 😉
Ditto 🙂
Oh, this is really well-done! The nickel is a great tip–I would not have thought of that. Thank you for sharing this.
Did you know lots of people also use thicker plywood cut into strips (any width really) as less expensive wood flooring? There are tons of tutorials out there. (google plywood floors) Some painted, others stained. It’s a great look. But they if your budget allows hardwood, I say YAY 😀
That would be fun to try because you could paint it and not worry as much about it. Wish I’d thought to try that in his room — would’ve saved us some money, for sure! 🙂
Looks fabulous, Julia!! Your son is one lucky kid. Would’ve loved this look for my room growing up although I had no clue what shiplap was until recently thanks to Joanna Gaines!
P.S. LOVE the look of your walls!
I had no idea how much shiplap is worth! I will keep this in mind when I purchase my fixer upper in Waco and have Joanna Gaines decorate it.
I know! If you find it behind your drywall, it’s like striking gold. Sadly, we don’t see much of the real thing here in Ohio!
Looks great! Can’t wait to see how it all pulls together.
What a nice new fresh look! Your son and guests will be so lucky to stay in there.
I love and had that bed too and can’t remember where it went. I have another iron bed, but it’s not the same, so I still miss it.
brilliant idea, great looking outcome!! thanks for sharing!!
This is brilliant! Thank you for sharing it, it is just in time for a project I’m starting, yay!
I have been wanting to install shiplap in my mudroom but wasn’t sure how to go about it. With your excellent tutorial, I am ready to get started! Your son’s room looks great!
Let us know how it turns out Debbi!
Oh, I love it! Great idea using the plywood strips, I’m really going to try that one of these days!
Wonderful transformation!! The room is so bright and airy now. I do agree that the light carpeting being replaced with wood flooring will be an improvement. Can’t wait to see the final reveal!!!
Love the feel you’ve achieved! It got me thinking of doing this with marine ply in the bathroom instead of tiling on tile.
I also had the idea of using it in a tiny room with a french door or central window to create an outside-in beach hut effect or an American front porch feel. I can imagine the board painted in a soft house exterior pastel colour with white trim and a fake ‘porch floor’ with wood planking, some rocking chairs and plant pots flanking the french door out to the garden! I can also see it in beach hut bright paint and white trim with deck chairs in bright stripes, and buckets, spades and lots of beach finds!
Ooh, I like all of your ideas, Janice!
What a great job you did. It sure lightened up the room.
I have been looking for some way to cover the basic plywood wall sheets in our tiny house on wheels that my wife and I are starting to work on. This may do the trick. Thanks!
I really like this idea.
Wow! It made such a huge difference, Julia! I love it 🙂
xo
Is Jacob really 20 now? Oh my. When did that happen? 🙂 Gorgeous walls! What a creative idea. I love it!
Yes, can you believe it? He was a lot shorter last time you saw him, Kristen! 🙂
I’m a sucker for anything nautical and this is no exception. Looks great! Looking forward to seeing the room as it comes along.
I can just imagine when your son comes home and says “Really Mom?! My room needed redoing for ten years and you waited untiI I went off to college?”
It looks great and I like the idea. After all that painting though it would probably be another ten years before I did it again.
I know, right? But I’m hoping he’ll want to visit more often now that his room is nicer. I’ll let you know if it works, ha. 🙂
I love this, and I love how you recreated what could be a very expensive look so inexpensively! I may be borrowing this in a new house very soon!
Great job, Julia! I look forward to seeing the finished product. 🙂
Hi Julia! I did this same method of shiplap for my guest bathroom a year ago and love the look. However, my panels needed a lot of sanding on the edges before installation. Did you have that problem? Perhaps it was because of the guy that cut them at Lowes…. Also a year later and they are popping loose in some places. I even used an adhesive as well as nails! I found that getting the nails in without going all the way through the thin boards was a challenge. Overall this small bathroom took WAY longer than I thought and while i still love the idea of shiplap, it makes me a little sad that its not holding up well. I just wanted to reach out and see if you or anyone else have had any of these issues. I think if i do this again I will spend a little more money and get a but thicker plywood.
Hi Jenni! I forgot about that, but now that you mention it, Dave did go over any rough edges with a sanding block first. The project took us a lot longer than we expected it to, too. It wasn’t difficult, but it was slow going. Gosh, I hope we don’t have issues with them popping loose down the road like you did. And you used adhesive, too? Wow. It’s hard to imagine with all the nails in the studs but I guess you never know. I’ll keep you all posted if we start having problems. Sorry to hear about yours!
Hmmm, this is giving me something to think about. I was just musing about how awesome this could possibly be for our ceiling. Currently have a combo of popcorn and bare studs (where we’ve removed walls). However, I am not a fan of redoing work! Maybe predrilling and then using wood screws? I’m going to have a look around the internet.
What about the corners? What did you do to make the corners fit and not overlap?
For the inside corners, we had to measure and then go down to the garage where we had the saw set up and cut each plank to fit. That’s one of the reasons it took us so long to hang the boards — all that walking up and down the stairs!
The outside corners, like the one where the closet juts out into the room, looked a little rough, so Dave covered them with vertical pieces of trim. It might be easier for you to see that in my “update” post because I took a photo of that trim before we painted it:
https://hookedonhouses.net/2015/03/25/bedroom-makeover-progress-new-hardwood-floors/